It's a new link party! So, go ahead, link up any project using SEI product. This is the perfect time to show us what you made for the March challenge. Need a reminder of what that is? Go here. Haven't finished yet? It's ok, you have until March 31st at 11:59 pm to finish and link up.
*****One lucky person who links up their project will win a $25 gift card to shopsei.com!*****
Don't forget to...
1. Add a link to your SEI project on our blog by clicking on the button at the bottom of this post. Your project must use at least one SEI product to participate.
2. Link back to us by adding this button to the bottom of your blog post.
3. Check each other's projects out & leave comments.
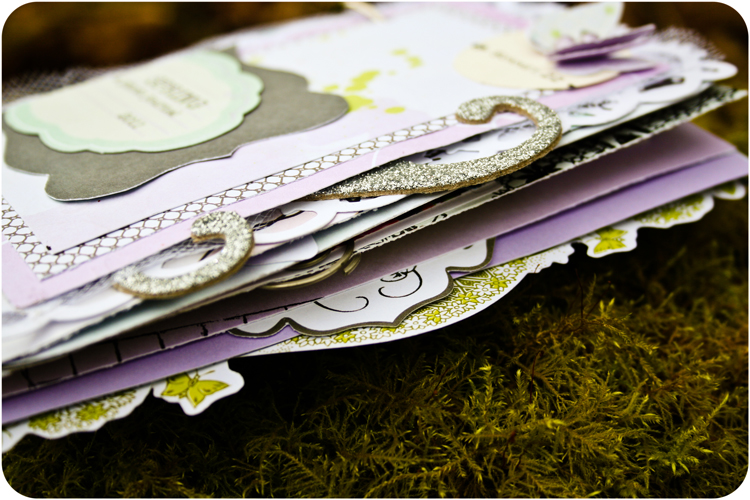
Kate made this spring photo journal with the Couture collection. She used spring photos and poetry throughout to highlight some of her favorite things about the season.
When Audrey sent us this layout we were surprised because it's not her usual style. It is so great that she was able to stretch herself and still come out with a nice layout. This is really hard for most of us to do, but we can learn so much when we try something new.
Audrey explains the journey, "When I got the White Elegance papers, I KNEW they would be perfect for misting or distress inking, and that the silvery images on the paper would resist the ink. They turned out just beautiful!! I have to admit that this purply-blue background paper was supposed to be just an 'experiment' piece to see how the paper would mist, but I loved the way it turned out, so I used it on my page. I also used another piece of the White Elegance for my base and inked the edges with a light brown ink. It, too, resisted very well. Papers and die cuts are from Moonrise, and more tickets from En Route. The flowers and butterflies are Monsterville yellow cardstock, and the flower centers are brads from Claire."
Kate is a brave and artistic paper-crafter. We can get so many ideas from her layout... use lace paper as a frame, cut a flower out of paper, attach an monogram sticker to a tag, make confetti, cut out circles to place behind a butterfly, put your title right on your photo...
Take a little time to really study a layout you admire and learn from it!
The title of this layout, "Happy Go Lucky" fits this photo and the Corinne collection so well. It is quite a diverse collection. Although there are flowers and rainbows, it still works great for boys!
Julie is great at utilizing her embellishments. For the clouds and strip of pinwheels, she simply cut the borders the length she needed them. She also layered journaling tags and frames under her photo.
Sometimes we may feel like we have to use the entire embellishment as intended. It's ok to cut, overlap, and make them work for you, even if it's not the "right" way to use them.
Club SEI's April kit features the Couture collection. Aren't club members lucky to be among the very first to receive our new collections? Click here to find out more about this kit. If you aren't a club member, you can still sign-up and receive it.
Guiseppa, a local paper-crafter, created some beautiful spring-themed alternate projects for us, using the contents of the kit. We decided to share this garland with you because it is such a great way to use scraps from any club SEI kit. The Couture colors work especially well for spring.
Audrey decided to mix it up on this layout. How did she make it work? Audrey says, "I focused on color combinations and went searching through the different collections for the colors I wanted."
"I used Kris Kringle for the background, strips from Monsterville and Corinne, sentiments and pther papers from Corinne, brads from Claire, and I even found some of these tickets from the older 'En Route' collection! I just love the way this page came out." (Count 'em up... that's 5 different collections!)
We hope Audrey's tip on mixing collections inspires you to shake things up on your next project!
Lisa used our new Corinne collection for this HAPPY birthday card. There are so many great shapes on this card from decorative edge on the top striped paper down to the scallop at the bottom. The scallop on the "happy birthday" tag reminds us of a cloud.
Lisa is great at clean and simple, but it's never boring. There are always nice well-placed finishing touches, like the heart and string on the kite.
Hello everyone!! It's Angela Ploegman a little sad, that it's my last post over here at SEI...but hopeful that my new friends will come visit me at my regular blogging home at Angela Ploegman Designs...
I any case, I definitely saved the best for last...here's the altered Inspirational frame I created with more SEI Couture papers!
This foiled, embossed chiffon paper was my absolute FAVORITE in the entire collection...it's so elegant and detailed and the gentle gradient of color from one side to the other was INSPIRING!...so I created an altered frame to hold inspirational quotes that I could easily change out when the need arose. The quote is printed on some of the patterned paper in the collection and embellished top and bottom with a bit of the shawl die cut lace paper. The Black Licorice Puffy Stickers are actually placed ON TOP of the glass, so they will always be there, even when I switch out the quote.
I have a new found love for crepe paper...the silver flower detail was formed from crepe paper that was punched on the outside edge with a scalloped border punch. I was then bunched and folded while adhering down to a punched circle base. Then it was embellished with some black bunched tulle, a silver flower and pearl gem. The purple embossed butterfly embellishment was double stacked on foam tape and finished with another couple of pearl gems...love the dimension this created on the butterfly.
Toodles all! It's been a blast this week, blogging for SEI!!
Thank you, Angela! It has been an inspiring week. We love the variety of projects and recipes you shared. Thank you for choosing to spend your week with us!
GIVEAWAY TIME! Would you like to win some of the brand new paper-crafting products from the Couture collection that Angela used this week? Then leave a comment on this post by Sunday, March 13th at midnight MST. Tell us which of Angela's posts was your favorite this week. The winner will be announced Monday so check back then.
Well hello again!! Sick of me yet??? I'm certainly enjoying my time here at the SEI Lifestyle blog...and I'm back to share another recipe...this time from my Dutch side of the family...here's a family favorite, a Dutch Indonesian Fried Noodle Dish called Bahmi Goreng.
Ingredients
4 cups medium egg noodles (mie noodles)
3 Tbsp vegetable oil
1 cup lean ground chicken (or pork)
1 pound of crispy cooked bacon (crumbled)
4 eggs, fried and thinly sliced
1 onion, finely chopped
2 garlic cloves, crushed
1 medium carrot, thinly sliced
2 cups chopped cabbage
2 cups fresh bean sprouts
1 leek, washed and thinly sliced
1/4 tsp coriander
1/4 tsp ground ginger
1/4 tsp tumeric powder
1 Tbsp ketjap manis (sweet Indonesian soy sauce, if you can't locate it, there are online recipes based on soy sauce)
2 tsp sambal oelek (optional, may be substituted with your favorite hot sauce)
salt to taste (about 1 tsp)
Instructions:
1. Fry the bacon, drain the fat and crumble, put aside. Fry the eggs, slice thinly, put aside.
2. Cook the noodles according to the package directions, drain, rinse and put aside.
3. Boil the cabbage, carrots and bean sprouts for 3 minutes. Drain and put aside.
4. Heat the oil in a wok or large skillet. Fry the ground chicken (or pork). Add the onion and garlic and simmer for 5 minutes.
5. Add the bacon crumbles back to the meat and onion mixture.
6. Add the leek to the meat mixture. After 1 minute, add the boiled vegetables, stir well.
7. Add the spices, then the noodles and lastly the eggs, stir very well and serve warm.
Another recipe 'for the books'...I hope you enjoy!
Hello everyone!! It's Angela Ploegman here to share a project at SEI Lifestyle... so excited to be back for another day of fun!
On of my FAVORITE things to do is to re-purpose and alter containers, especially if it means NOT throwing them out! I have 2 drawers FULL of alterables that I dig through on a regular basis. This gem was a chipboard pencil keeper box originally and now is a fancy gift box...thanks to the fabulous SEI Couturepique and chintz papers the 'redo' was a success!
The outside of the box was covered with the pique paper...I added a foiled die cut and a doily and then created a tissue paper flower using the tissue and toile pack from the Couture collection. The tissue paper flower is attached to a button, which is attached to the box with foam squares-this allows space for the ribbon to loop underneath the flower and tie onto the added knob to keep the box closed.
The inside of the box is decorated similarly, using the chintz paper on the box bottom and underside of the lid. I added a doily and some layered punched circles and finished it with a monogram letter from the Black Licorice Puff Stickers.
Hi again, it's Angela Ploegman and I'm super excited to be back for Day 2 of my week on the SEI Lifestyle Blog.
This year I'm making a special effort to document my family recipes. I do this by first posting the recipe to my blog (already doing this part!) and then I'm planning to transfer them to a handmade recipe book/recipe stand. If things go well, I hope to make digital photo books for my immediate family as a Christmas present. As my husband is originally from India and all four of my Grandparents are from the Netherlands, there should be an interesting mix of recipes by year end!
So today, I'm sharing a recipe for Curried Fried Rice. All of my Indian recipes come from my sister in law...each time I visit, I try and pick up a new one...usually I modify them a bit for my husband's taste, but this dish is perfect the way it came!
Curried Fried Rice
Ingredients:
3 Tbsp Butter
3 Tbsp Oil
6-7 whole cloves
2 bay leaves
4-5 green cardamon pods, crushed open
1 cinnamon stick, crushed
1 Tbsp green fennel seeds
1/3 cup whole raw almonds
1 finely chopped onion
1-2 green chilies (optional)
1 1/2 Tbsp ginger garlic paste (if you can't find prepared, use equal parts of each mixed together)
mixed vegetables, 1 small package, frozen
3 cups basmati rice
1 can coconut milk + enough water to equal 5 cups
2 tsp sugar
1 Tbsp garum masala
salt to taste (usually about 2 tsps)
Instructions:
1. Melt the butter in oil over low heat in a heavy bottomed stock pot. You will end up with 6-8 cups cooked rice, so use an appropriate sized pot.
2. Add the cloves, bay leaves, cardamon pods, cinnamon stick and green fennel seeds.
3. When the aroma of the spices is noticeable, add the raw almonds. Stir occasionally until the almonds are lightly roasted.
4. Increase the heat to medium-low and add the onion and green chilies (if desired). Cook until the onions are translucent.
5. Add the ginger-garlic paste. Cook for 5 minutes.
6. Increase the heat to medium and add the frozen mixed vegetables. Cook for 15-20 minutes or until the vegetables are warmed through.
7. In a separate bowl, combine the coconut milk with enough water to make a total of 5 cups of liquid. Add the salt until the liquid is obviously salty (this is OK as the rice will adsorb most of the saltiness), then add the sugar and the garum masala. Set aside.
8. Add the rice to the onion/vegetable/spice mixture. Cook for about 10 minutes or until the rice kernels appear opaque.
9. Add the coconut/water mixture to the rice and bring to a full boil (stirring constantly and increasing the heat if necessary). The mixture will become thicker before it boils. Turn on a second element to 'simmer or low' to have ready for the next step.
10. When the rice mixture reaches a full boil, put the lid on the pot and transfer the pot to the alternate element (set on simmer or low).
11. Cook for 25 minutes, take off the stove and let rest for 10 minutes. Fluff with a fork and serve!
I hope you enjoy this recipe! It's one of my favorites!
Hello everyone!! It's Angela Ploegman here to kick off my week blogging at SEI Lifestyle...let's start with a layout I created using papers from the Bissette Collection...
I LOVE how the pearlized paper took the water based mists...I first sprayed a turquoise mist in a few spots and then overlapped those spots with a yellow mist...I jiggled the paper a bit to mix the colors and then wiped off the excess with a paper towel...love the effect...I think this technique would work equally well for the White Elegance papers as the pearl finish is the same as in the Bissette line.
Not one to waste much, I used the paper strips that I cut off the background paper to expose the black cardstock base to form a boy-friendly flower...the strips were formed into loops and then stapled in the center and layered on top of each other in a staggered pattern. The black paper squigglies were thin black strips of cardstock that I made wet, wrapped around a journalling pen and let dry...the flower center is a black gem on a chipboard letter 'o'...super fun and easy to make embellishment!
The black matting around many of the page elements really gives the page a masculine touch...if you saw the paper pad, you wouldn't immediately think 'boy page', but it certainly works here!
Please give a warm welcome to next week's guest blogger, Angela Ploegman. She is an accomplished paper-crafter and the author of the creative blog, Angela Ploegman Designs. Stop by to say "hi" and find plenty of project ideas. Introducing Angela...
I live in Bettendorf, IA with my husband of 11 years and my 7 year old son and 3 year old monster, oops, I mean daughter! I started scrapping in 1999 when I moved to the area from (beautiful, spacious and a tad bit cold) Canada. I have a degree in Chemistry (yes, I'm a certified NERD) and an MBA that I use by day as a lab manager for a paint company. In addition to my passion for paper crafting, I enjoy cooking, baking and a good cup of coffee (Starbucks anyone?)
My crafting style is best described as simple, layered and linear. I enjoy mixing patterned paper and though I do use a variety of techniques on my projects, the focus is always on making them fast and easy (as I don't have a lot of spare time!) I have been published in a variety of idea books and magazines including Scrapbooks Etc., Scrapbook Trends, Cards, Simply Handmade, Stamping, Scrapbooking and Stationary, Memory Makers and Scrapbooking Memories. Please stop by my blog Angela Ploegman Designs or visit me on Facebook! Can't wait to share some crafty goodness (and a recipe) with everyone next week!!
Lisa's goal for this group of cards was to make them "light and cheery with a young feel". What a great description! It was smart of her to keep the recipients in mind when designing the cards. These were sent to some young ladies at her church. They were created from the With All My Heart collection.
Lisa designed a great card and switched it up with different flowers, instead of coming up with a new design for each girl. What a timesaver!


