Lori has a beautiful winter layout to share today. Isn't that sled the coolest? Mostly she used the Kris Kringle collection but she snuck something in. Can you guess what it is?
Give up? Ok, we'll tell you. This gal is so creative! She actually took a border from the Spooks Halloween collection and covered the orange border with Stickles to look like icicles. Here's a close-up.
The elegant layered snowflakes fit so perfectly with this chilly snow scene! Now that January is almost over, we are kinda wishing that stuff would go away here in Utah. How about you? Anyone nice and warm at CHA?
It's the beginning of a special link party today! Not only can you post any project using SEI product, you can also post your layout from the challenge (details here). If you haven't finished the challenge yet, you can still do it over the weekend. The party ends January 31st at midnight MST.
Remember to...
1. Add a link to your SEI project on our blog by clicking on the button at the bottom of this post. Your project must use at least one SEI product to participate.
2. Link back to us by adding this button to the bottom of your blog post.
3. Check each other's projects out and be sure to leave lot's of comments.
It's almost February and Valentine's Day will be here before you know it. You don't have to spend a lot on decor to make it fun and personal. Kate has two great ideas for you.
First, aren't these Valentine's garlands beautiful? They could be hung just about anywhere!
Kate made them by cutting several circles out of papers from the With All My Heart collection. Then she folded them in half and adhered each one to half of another circle, while stringing them along.
For her next idea, Kate used paper clips to hang some of her favorite photos, love quotes, and heart accents from a wire.
The garland strung along the wire, is the perfect finishing touch, don't you agree? How do you decorate for Valentine's Day?
Lucky for us, we are having a blast creating fun projects for CHA with our new collections. They are so much fun to use!
That's not so lucky for you because we have been a little MIA on the blog lately. Don't you fear because Lisa has saved the day with this thank you set she made for someone who really deserved it!
Here's a detail of the pretty Moonrise card she included with the gift.
Here is the outside of the sticky note holder Lisa made.
If you are ready to make your own, Lisa explains how to do it.
"The sticky note holder measurements are- 5 1/2" x 4 1/4" then scored at 2 1/2", 3", 5 1/2",6", 7 1/2". Round corners and add velcro coin to close. Trim papers to same width but 1/16" smaller to take into account the score areas that you don't want covered or overlapping."
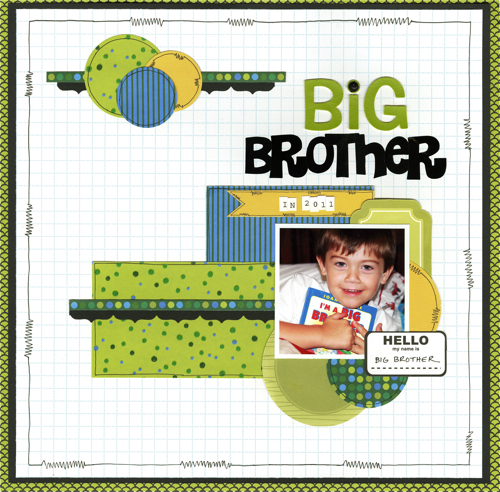
Julie's son is a big brother now! To get ready she decided to scrapbook him reading a book about becoming a big brother.
Mostly she used the Monsterville collection for this layout. She also snuck in a few of the green Kris Kringle elements here and there.
If you own a cutting machine, like Julie, take advantage of your ability to create custom shapes and titles. Then you don't need to purchase as many embellishments.
The doodled borders add a nice finishing touch. This technique would also be great for someone who doesn't own a sewing machine but wants to create a similar effect.
Time to announce the giveaway winner as selected by Random.org...
Congratulations, Alisa! You won yourself some SEI goodies. Just send us an e-mail with your mailing address to seiblog{at}shopsei{dot}com and we'll take care of the rest.
Also just a quick reminder that the month is more than half over so you only have two more weeks to complete the challenge. Read all about it here.
Happy Friday! Jill Cornell here for my final post...I can't believe how quickly this week has flown by. I've saved my favorite project I created for last! For my final project to share with you this week, I created this layout using the "Kris Kringle" collection. Every year at Christmas, my sisters and I take a new photo together. It's a tradition my mom started when we were very little and we still uphold it today.
Here's a look at my layout...
When I first saw the reverse side of the "Snow Angels" patterned paper, I fell in LOVE! Those circles are my FAVORITE and I used a tone-on-tone effect for a lot of added texture.
To create extra texture, I punched snowflakes of a variety of sizes out of the same circles I wanted to adhere the snowflakes to. I adhered rhinestones in the centers of the snowflakes.
Here's a little hint for title work, use a black journaling pen to outline the letters and it will help them pop off your page:
Finally, I used the white opaque mist from Studio Calico to add a snowy look to my kraft cardstock.
Thank you so much for checking in with me this week and taking a peek at my projects. Thank you to SEI for the opportunity to bring you some inspiration this month!
Thank you Jill! What a clever use of the snow angel's paper today! It has been such a fun week with a diversity of great projects throughout. We love to see the creative way you mix papers and products to create a new look everyday.
Since Jill was so great at mixing it up this week, we thought we would mix up the giveaway too. To enter to win a mixture of the goodies Jill used this week, leave a comment on this post by Sunday, January 16th at midnight MST. Tell us which of Jill's posts was your favorite this week. We will announce the winner on Monday. Be sure to check back to see if you are the winner so we don't have to pick a new one.
Happy Thursday! Jill Cornell here with you again today to share a fun project in honor of Valentine's Day. I have the world's worst sweet tooth, and I know I would love to receive some sweets this year! A fun way to give something sweet to your sweetheart is by placing the treat in a bag and making a topper for the bag. I used the "With All My Heart" collection on this set of three treat bags.
To make the treat bags, follow these simple directions:
1) Measure patterned paper to approximately 4" x 6" and fold it in half. Ink the edges.
2) Sandwich the bag in between the open end and zig zag stitch to close.
3) Punch holes at the top of the bag and thread with ribbon and tie in bow.
4) Decorate with assorted die-cuts, buttons, and twine.
Here are a few close-ups of each bag...
Thanks for looking today! I'll see you tomorrow for my grand finale! :)
Happy Wednesday! I can't believe my week with you is more than half over! I'm really excited to show you my layout today that combines (count 'em) 1, 2, 3 SEI collections. WOW! You'll see bits and pieces of Kris Kringle, Monsterville and With All My Heart.
First, here's a look at my layout of my sweet daughter, Nora. I captured and recorded important information about her personality and development on this layout.
Can you spot the different collections? Let me help you...
The multi-colored striped patterned paper (Intersections) and pink striped patterned paper (Posie Way) are both from Monsterville. I also used patterned papers from this collection for the punched hearts at the top of the layout.
And there's the reverse side of the "Evergreen" patterned paper from Kris Kringle again at the top of my layout:
Finally, I used several of the die-cuts (heart, circle, flower) from With All My Heart:
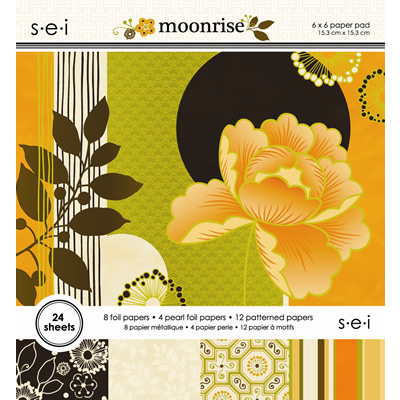
Happy Tuesday! Jill Cornell here again with a simple little card to share with you using the beautiful "Moonrise" collection. I kept the design fairly simple by using just a couple of the pattern papers, a leaf die-cut and a label die-cut. I even pulled out some ribbon I still had in my stash from SEI's "Dill Blossom" collection from a few years ago that matched everything perfectly. I used glue dots to pleat the ribbon and then ran it through my sewing machine to secure the pleats.
I worked with SEI's 6 x 6 paper pad and die-cut pearls accents to create this card. The 6 x 6 paper pads are the perfect size for card makers as they give a scaled down version of the collection's patterns.
Happy Monday! Jill Cornell here with you to kick off a fun week of SEI projects! My first project to share with you this week uses the whimsical, bright "Kris Kringle" collection on this layout of my twin girls enjoying their first Christmas last year.
These are two of my favorite patterned papers in collection and you'll see them again in layouts later this week:
Let's take a closer look at my layout for some of the details...
For the title of my layout, I used the "Kris Kringle" alphabet stickers and the dimensional page titles. I punched out a scalloped circle from the "Boxing Day" patterned paper, placed a white cardstock circle in the center and then used foam adhesive to add the "Joy" sticker.
I hand drew a scalloped border using the reverse side of the "Evergreen" patterned paper and punched some snowflakes as accents.
I LOVE the set of trees included with the "Kris Kringle" dimensional page titles and featured it here as a page accent.
A couple other things to note about my layout:
1) I have an obsession with kraft cardstock....you'll be seeing kraft frequently this week! :)
2) A little white opaque mist from Studio Calico gave a snowy feel to my Christmas layout.


