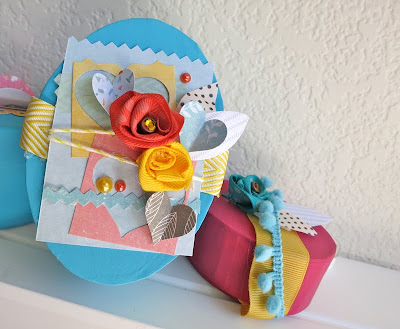
Hey there! I love using SEI papers and embellishments to doll up simple items, like this little gift box trio! With a little paper, some fun sparklies and cute little die cuts, you can take a plain blah box and give it some pizazz! Let me show you how.
First you'll want to paint each gift box with two coats of Acrylic paint. The fun begins when they're completely dry! For this box, I started by trimming Jimmies N Cream, and then adding some strips from Vanilla Sunshine Borders. After the base is adhered to the box, punch hearts from Lemon Breeze and paper from the 8.5" x 11" Card Making Pad, fold in half and adhere. I then took some polka dotted trim, wrapped some yellow and white string from sundries around the dotted trim and affixed it to the box. Finally, you can add some pearls!
I love the dimension you get from folding up patterned paper and adding pearls and ribbon.
This box is a little bit smaller than the box above, but bigger than the cute little pink box. I wanted to play around with the negatives of a punched shaped. First, I trimmed some ribbon and adhered it to the box, then I trimmed a block of Perennial Wish with decorative edge scissors and adhered it to the box. After, I punched hearts from Marigold Dreams and adhered it to Perennial Wish, adding a cute little rick rack trim of patterned paper. I added some more hearts using Lemon Breeze and paper from the 8.5" x 11" Card Making Pad and added some hand cut leaves from fabric swatches found in Vanilla Sunshine Coordinates. Finally, I rolled some flowers from ribbon trim, adhere some sparkly brads from Sundries in the center of the flowers and finished it all off with some pearls.
This little pink box is super sweet and very easy to make. Add some yellow ribbon trim, some hand cut leaves from fabric swatches in the Vanilla Sunshine Coordinates and hand-rolled flower with a sparkly brad in the center from Sundries.
The fun thing about this gift box trio is you can simply change the paint colors and switch out the patterned paper and get a completely different look!
Emily


2 comments:
CUTE box!
Thats really cute and nice box. I would try to make such box. The London Fancy Box
Post a Comment