Hi everyone! It's Natt Smith here with you today. One of my favorite cards to make is a "just because" card. These cards encourage people to make them feel better either with themselves
or what they have gone through.
I created this card to encourage my friend on her hard time finding a job and changing her career path.
"Believe you can and you will."
For this card, I simply start with cut square orange plaid and adhered it on to card base.
Next, I layered it with cream pattern paper. Then I added a little layer and dimension using peach rose trim. Last, I used foam adhesive to add the sentiment on to it.
Hello everyone. It's Natt Smith here today to share with you a sweet little card. The sentiment on this card is just caught my heart.
"The ones that love us never really leave us"
For this card, I mixed stripe and floral patterns together. They just fit perfectly together.
I started with the peach stripe paper and cut it to fit on card base. Then added a scallop border on left and right. Next I started layering several banners together using foam adhesive. I finished it with the sentiment.
Thank you so much for stopping by. I hope you enjoy my creation.
xoxo
Natt Smith
Hello There! How do you say "Hi" to your love ones? A phone call or email? How about starting a new tradition by sending them a card handmade by you. Today I have a card to share that you can make to and send to your family and friends.
For this card, I started with cut heart pattern paper and adhered it to a card base. Then I added a white die-cut heart tag that I sprayed with yellow spray ink.
Add lace trim on top right of card.
Then call it done! Now you have a cute little card to sent to your friends.
Thank you so much for stopping by.
xoxo Natt Smith
Hello everyone it's Natt Smith here with you today. Summer is not just a fun time in the sun at swimming pool but it's also a great time for us to go explore.
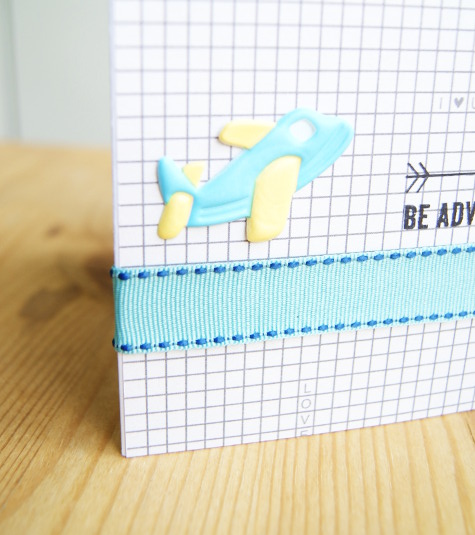
To invite my friends to go out and see the world with me I created this card. For this card I started with cut grid patterned paper. I adhered it to a card base.
Then I added blue ribbon across the bottom part of card and stamped my sentiment. To add more dimension, to this card I used the airplane puffy sticker.
Simply easy card to send out to friends.
Let's be adventurers!
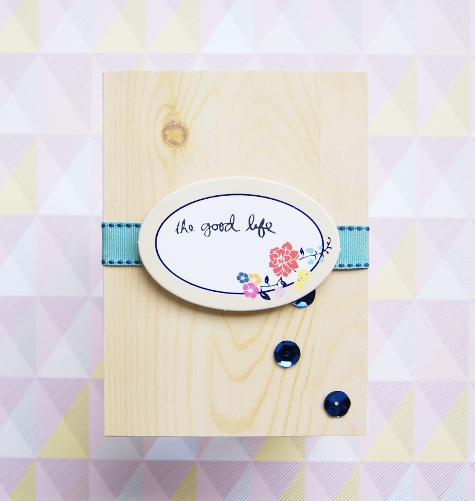
When it comes to making a simple and quick card, it doesn't need to be boring. You can add texture and fun supplies to your card to make it more detail-ey. Today I have a card that I wanted to share with you. It's very simple but not plain.
"The good life"
This card is a card that you can give to your friends for any occasion.
To make this card, I used something that is sewing related... sequins and ribbon. I started with cut woodgrain paper from the Blooms and Blossoms collection. I adhered ribbon across the card. Then stamped a sentiment on oval chipboard frame. I adhered the sentiment on top of the ribbon with foam adhesive.
Hi everyone! Finally, it's getting warmer here in Colorado. When it comes time for summer, it makes me think about using fun and bright colors for my projects. Today I have a fun bold card that I created to share with you.
"You are loved"
For this card, I used the color-blocked paper from the "Blooms and Blossoms" collection. I adhered it to a card base.
To add more details, I added gold eyelets to the card.
Then I sewed a sentiment to the left corner.
That's it! Quick and easy card. Perfect for brightening up your loved one's day.
Hello everyone It's Natt Smith here! Today I have a simply cute little card to share with you using my most favorite thing for paper crafts project... "Puffy stickers"
Summer is almost here and it makes my heart sing. I just love summer. It gives me opportunity to go outside and do stuff without having to wrap myself up in 10 layers.
Also, summer is so inspiring. With all the flowers blooming, people outside and clear blue sky. My card today is inspired by the open sky summer.
"You Are My Sunshine"
For this card, I cut "You're my sunshine" using my die cut machine on pattern paper. Then matted under with glitter paper. I decided not to use a bright glitter color paper because I just wanted this card to be a little neutral. So that puffy stickers can be the point of interest.
Hello Everyone! It's Natt Smith here. This week SEI has teamed up with Scor-Pal. As a card maker, when I received my box of goodies, I automatically got a big grin on my face.
Remember a time when you tried to fold your card base in half and it wasn't even on both sides or you tried to add a crease on your projects or rosette it was totally messed up? Well, now that I have a Score-Buddy, it will make my card-making process even more fun!
So let's take a look at what I created using my Scor-Pal tools and SEI product shall we?
Enter the giveaway below for your chance to win one of TWO SCOR-PALS we are giving away. Scor-Pal is giving away the Club SEI May Paper-crafting kit, the Club SEI May card kit and more over on their blog. So go check it out! :)
Hi Everyone! It's Natt Smith here. Finally it's warm outside after a long cold winter here in Colorado. It's time to celebrate the fun and colorful spring/summer. But is not fun to celebrate it alone. So, today I have a fun card that you easily mass produce for your friends and family to let them know that summer is almost here.
This card it's easy and simple with only 5 steps to complete. Since spring/summer is all about blooming flowers. I decide to add a flower on my card. Let's get started.
Gather all of supplies listed and start your making card :)
First, for mass producing a card I usually start by making a whole bunch of small pieces. For these cards I made a few flowers by layering them & attach patals together using pearl brads.
Then I used a boarder punch on orange pattern paper. You don't have to cut it to fit the card base just keep the whole thing.
Adhere pink paper onto the card base and pink stripe pattern paper. Adhere boarder between those 2 patterned papers. Cut it to fit. Then stitch around.
Use the puffy alphabet sticker for your sentiment.
Layer hexagon die-cuts onto your card. Then add flowers to make a centerpiece.
Repeat step for more cards. Here is how this lovely card turned out.
Easy and quick way to spread the joy ^_^ Thank you everyone for stopping by! Hope you enjoyed my creation.
Hello everyone. It's Natt Smith here with you today to share one of my favorite cards I created using Mia Bella collection.
This collection's color scheme it's kinda out of my league. So, I challenged myself by using a color that I feel intimidate by. The color is this green-ish -gray color. It makes me feel like what can i do with it? I usually work with a lot of bright colors.
What am I going to do? (with a little panic attack) I took a deep breath and told myself it's going to be ok. It's just grey.
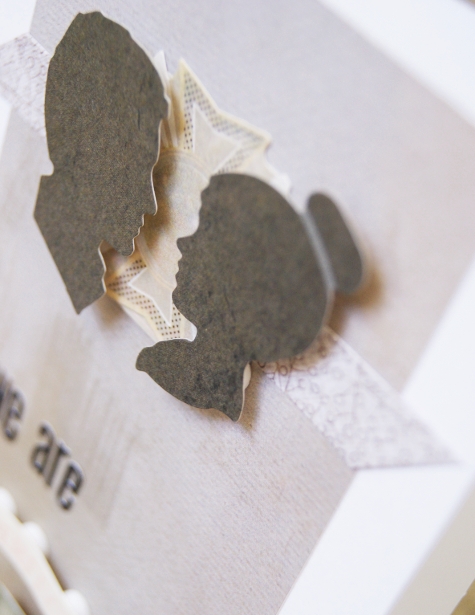
So, I started by laying down all the embellishments and stickers. Then I saw man & woman silhouette stickers on sticker sheet and it came to mind that I should make a card for my man. Here is finished product:
I worked my card around the stickers. I started by cutting a wide strip of distress patterned paper and adhering it to center of the card base. Then I added a strip of grey patterned paper, label stickers and the sentiment (using the "perfect" and "together" stickers). Then I used mini alphabet stickers for "we are".
Here is a closer look at this card.
I attached all the stickers and sentiments with foam adhesive to add some dimension.
Handmade cards are great for any occasion. Sometimes you just want to say "Hello". But, wouldn't it be much more fun to send your friends a card to encourage them? It might be to encourage them to be happier, stronger or healthier.
Today I have cards that I made using some encouraging sentiments. Let's take a look.
Draw a line along the edge. Adhere "Be Brave" sentiment on bottom left using foam adhesive.
"Live Simply"
How to: Cut pattern paper to 4x6". Splatter black ink onto the center of the card. Then add pre-cut triangle pieces to the card make them look like quilt blocks.
I also added a brass feather to the top right of the card. Then attached the "Live Simply" sentiment using foam adhesive.
That's it! A simple and easy card that you can sent to your friend. Thank you so much for stopping by everyone. I hope you like my creations!
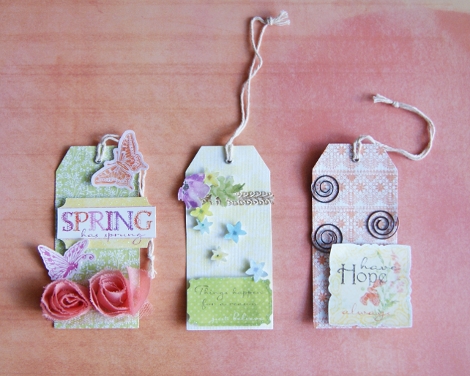
Hello, Everyone. I'm feeling springy!! Aren't you in love with spring? I am. All the pastel colors and easter bunny themes everywhere makes me feel fresh and ready for the season.
The Diane scrapbook collection is totally raising my spring spirit. I just can't wait to use them to make more fun and creative things. But let's just start with what I made for now shall we?
I love sending cards and gifts to my love ones when the seasons change just for fun. So, I made these tags to add to a package that I will sent to my friends. These tags are Diane tags die cut accents. They make my life much easier because they are patterned paper pre-cut and very easy to alter.
Tag No.2: The rose ribbon makes this simple tag more interesting. I also added some layers to it.
Tag No.3: I used a lot of foam adhesive on this tag. All those cute little flowers coated with glitter just makes this tag look like it has been sparkled with fairy dust.
Now all the packages for spring are packed and ready to be ship to my lovely friends.