


Want to make a cute stripey skirt? I used the SEI for Robert Kaufman Eerie Alley line for this one-love the cute Halloween colors!
So...read on for a tutorial!
You'll need:
material-how much of each print depends on the size of your skirt-or your preference
3/4 inch non roll elastic
matching thread
sewing stuff (machine, scissors, rotary cutter is handy, etc...)

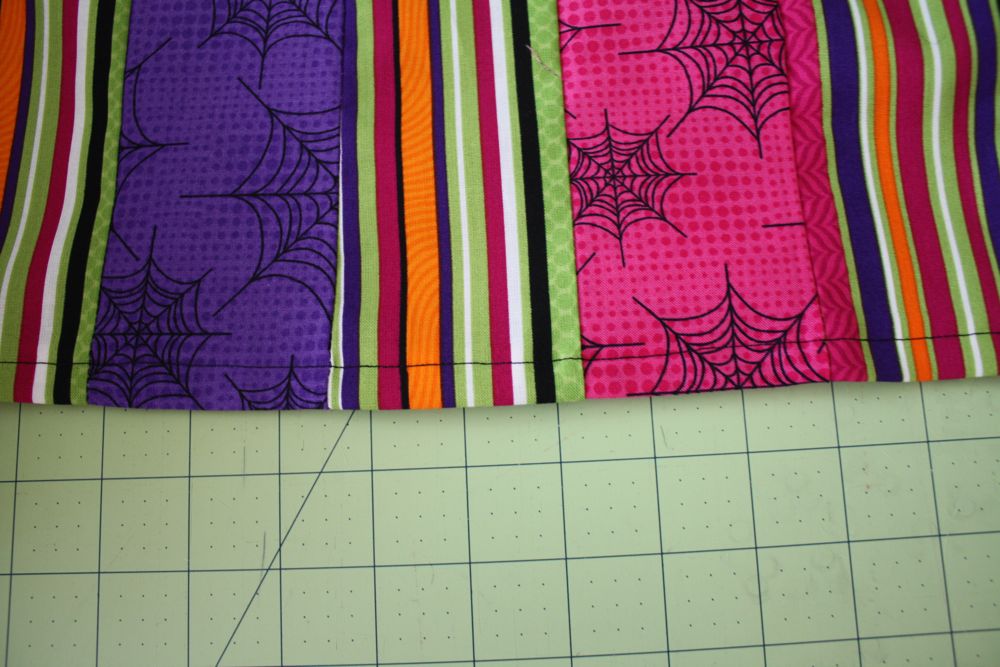
First, cut your strips-Mine were 13 inches long by 3 inches wide. You can make them longer or shorter or wider...depending on your preference and child. I ended up using 16 panels. Lay them out to figure out your pattern. Ignore that mine aren't lined up, please!

Sew all your pieces, right sides together, until you have a fabric tube, and press seams with an iron.

Now hem one side by ironing the edge over 1/4 inch...

and then 1/2 inch.

Sew around the bottom for your hem.

Now measure how wide your tube is, add 1/2 inch to that measurement, and cut out a piece of fabric that long by 3 inches for your waistband.

sew the short ends together.

make sure it fits your fabric tube, adjusting if needed.

now, pin the right side of your waistband to the WRONG side of your skirt piece.

sew around the edge with 1/4 inch seam.

now flip it up like so and press with iron.

press the top edge under 1/4 inch, and then fold over the seam on your skirt, like so..

tada all nicely pressed.

now sew along the edge, leaving an 1 1/2 inch space for the elastic.

cut your elastic to fit your child, then thread it through with a safety pin.

I like to secure the other end with a pin so it doesn't slip through. That's annoying!

sew the ends together, overlapping a little bit, with a zig zag stitch.

Sew the opening shut, and you're done!

pair it with a cute witch shirt-and you're in business!

I made this CA-UTE little witch shirt using the iron ons from SEI. They're insanely easy, you peel off the feature (eyes, legs, cauldron...) you'd like, and iron on a shirt-or bag-or whatever. You have to be gentle when you peel them off, but other than that they're super fun and easy to use! I chose to make a cute one instead of scary for Sadie cause I'm a wuss when it comes to scary things.
Even iron-on witches.

So...read on for a tutorial!
You'll need:
material-how much of each print depends on the size of your skirt-or your preference
3/4 inch non roll elastic
matching thread
sewing stuff (machine, scissors, rotary cutter is handy, etc...)

First, cut your strips-Mine were 13 inches long by 3 inches wide. You can make them longer or shorter or wider...depending on your preference and child. I ended up using 16 panels. Lay them out to figure out your pattern. Ignore that mine aren't lined up, please!

Sew all your pieces, right sides together, until you have a fabric tube, and press seams with an iron.

Now hem one side by ironing the edge over 1/4 inch...

and then 1/2 inch.
Sew around the bottom for your hem.

Now measure how wide your tube is, add 1/2 inch to that measurement, and cut out a piece of fabric that long by 3 inches for your waistband.

sew the short ends together.

make sure it fits your fabric tube, adjusting if needed.

now, pin the right side of your waistband to the WRONG side of your skirt piece.

sew around the edge with 1/4 inch seam.

now flip it up like so and press with iron.

press the top edge under 1/4 inch, and then fold over the seam on your skirt, like so..

tada all nicely pressed.

now sew along the edge, leaving an 1 1/2 inch space for the elastic.

cut your elastic to fit your child, then thread it through with a safety pin.

I like to secure the other end with a pin so it doesn't slip through. That's annoying!

sew the ends together, overlapping a little bit, with a zig zag stitch.

Sew the opening shut, and you're done!

pair it with a cute witch shirt-and you're in business!

I made this CA-UTE little witch shirt using the iron ons from SEI. They're insanely easy, you peel off the feature (eyes, legs, cauldron...) you'd like, and iron on a shirt-or bag-or whatever. You have to be gentle when you peel them off, but other than that they're super fun and easy to use! I chose to make a cute one instead of scary for Sadie cause I'm a wuss when it comes to scary things.
Even iron-on witches.


6 comments:
I'm lovin' this!
way cute jess! great job as always!
What a cute skirt! I found your tutorial through the Craftiness is not Optional blog, and wanted to pass it along through my blog, which doesn't have a 10th of the Craftiness followers. LOL It's just too cute an idea not to share it and pass it along.
I was wondering what to do today. Beverly's is having a sale or something... I think I hear fabrics calling my name! hahaha
Absolutely adorable!!! Love the skirt & top :)
So cute!!
This is such a cute idea! The fabric combo on the skirt is adorable. And I love that little witch!
Post a Comment